Installing a Lightroom Plugin manually
If you have downloaded the zipped file of the lightroom plugin folder, you must follow these steps.
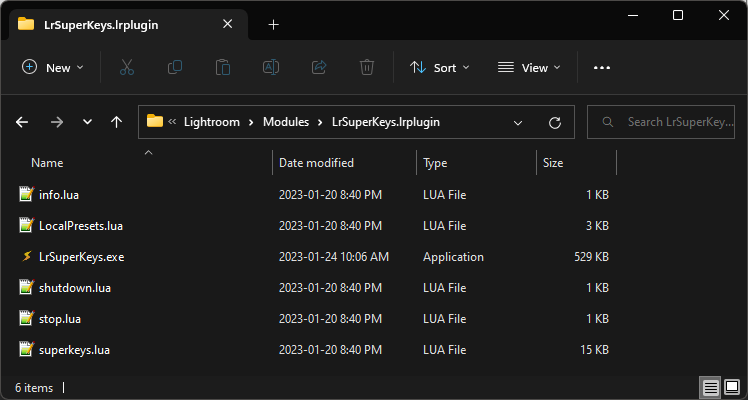
First, extract the downloaded zip file to a location where you want the plugin to reside. After you have extracted the zip file, you should have a folder named LrSuperKeys.lrplugin
For both Windows and macOS, a lightroom plugin is a folder containing all the files necessary for the plugin to operate. The extension of a Lightroom Plug-in folder is .lrplugin.
For LRSK, the plugin folder is named LrSuperkeys.lrplugin
Here we can see the contents of that folder.
Now in order for the LrSuperKeys application to communicate with Lightroom, Lightroom must be aware the plug-in exists. This can be done by either using the Lightroom Plug-in Manager or by moving the plugin folder into the default Lightroom plugin folder.
Adobe Lightroom default Plug-in Folders
Windows:
\Users\user\AppData\Roaming\Adobe\Lightroom\Modules\LrSuperKeys.lrplugin
macOS:
/Users/username/Library/Application Support/Adobe/Lightroom/Modules/
By placing the plugin in one of these default Lightroom folders, Lightroom will automatically detect and enable the plugin when Lightroom is opened. (Both the Windows and macOS installations place the plugin in this folder)
Lightroom Plug-in Manager
Open up the Lightroom Plug-in Manager by selecting the menu item File > Plug-in Manager
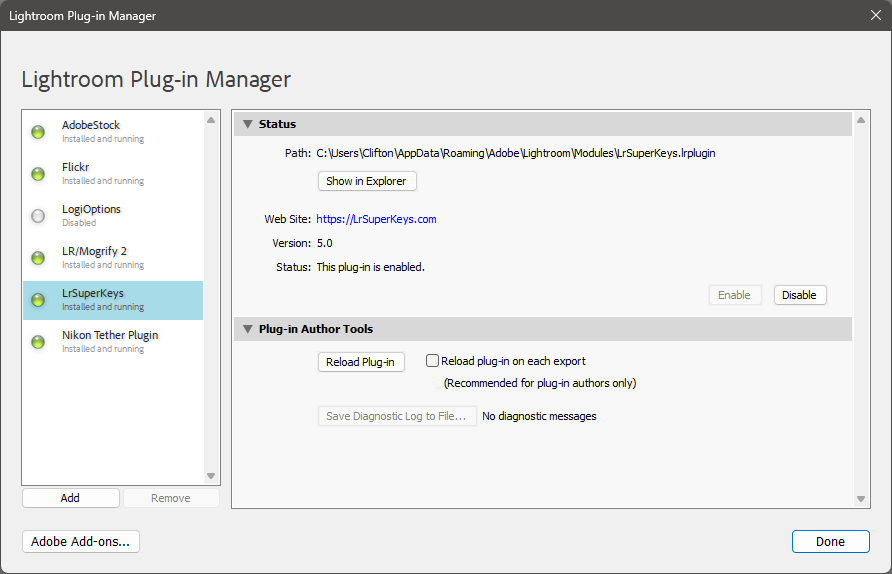
Press the Add button (bottom left) and locate the plug-in folder you downloaded and extracted. (LrSuperKeys.lrplugin)
Once you have selected the folder, you should see the plugin added to the list of plugins as shown above. You will also see an Enable and Disable button. If Enable is not selected, click on it now.
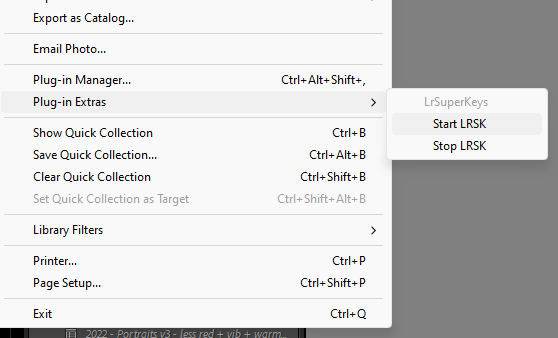
Start and Stop LRSK Plug-in
LRSK will automatically startup and shut down with Lightroom.
To manually start and stop LRSK, you can access the Lightroom menu items “Start LRSK” & “Stop LRSK” located under File > Plug-in Extras