Speed Menu
Getting Started
Introduction to the Speed Menu
The Speed Menu is designed for those who do a lot of photo retouching in Lightroom.
It enables you to quickly select local adjustment presets together with masking tools with a single click.
Revealing the Speed Menu
The Speed Menu is hidden by default. This way, it does not clutter your workspace unnecessarily.
To show the Speed Menu, we have assigned a Speed Key allowing you to reveal it. The default key is TAB.
Simply press and hold the TAB key and the Speed Menu will be revealed. Release the TAB key and the Speed Menu will fade away.
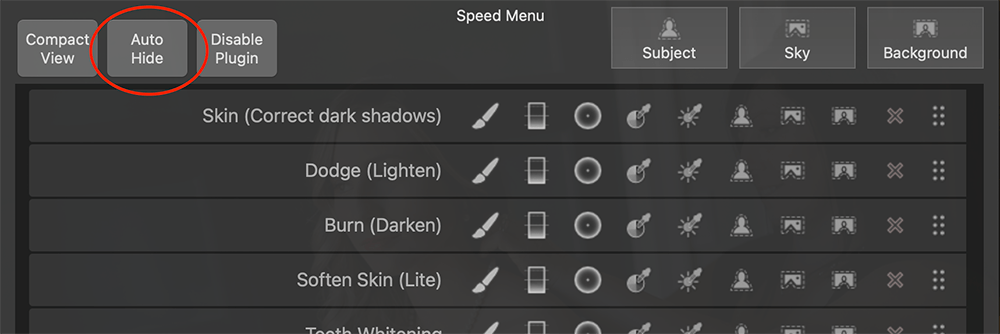
You can force the Speed Menu to stay visible at all times. Simply press the Auto Hide toggle button. This will pin the Speed Menu to your screen. To have the Speed Menu automatically hide again, click on the Auto Hide toggle button one more time.
Getting Started with the Speed Menu
The Speed Menu is empty when you first run LrSK.
We don’t populate the Speed Menu with all your masking presets, but instead allow you to choose your favorite and most used ones. Some users may have dozens or hundreds of masking presets and this would defeat the purpose of the Speed Menu.
Adding your presets to the Speed Menu is easily accomplished by picking your favorites from a drop-down list.
Let’s Populate the Speed Menu
Let’s add six of our favorite masking presets to our Speed Menu.
We will click on the Add Preset button and choose our first favorite preset from the list. Now, we will simply repeat to add five more favorites.
Click to play to watch…
Sorting your Speed Menu
The list of masking presets can be sorted manually.
At any time you may move a preset within the list.
Simply click and drag the handle and move the preset to a new position. Watch as we re-order our list…
How to use the Speed Menu
We already know how to reveal the Speed Menu using the assigned Speed Key (TAB).
You will notice that each masking preset has its own set of masking tools.

Simply click any one of these tool buttons and Lightroom will create a new masking layer, activate the tool you clicked on, and apply/activate the masking preset.
For example, if we click the AI Select Subject tool button within the Dodge preset, Lightroom will activate the new AI Select Subject tool and apply the Dodge preset, brightening our subject.
After the preset has been applied, we can use our Speed Keys to quickly make adjustments to our mask selection.
Watch as we do just that! You will see the couple get selected and then dodged with a single click. Then we show you how you can adjust the mask exposure with Speed Keys.
Now let’s say we want to use a burn brush, we would simply reveal the Speed Menu, click the brush tool button within Burn (Darken) preset, and then begin painting on our mask.